Home repairs cost time and money, and there are a few considerations. To ensure that the renovation of your home goes smoothly, create a comprehensive plan with a maximum budget. Hiring others to plan, design and budget the project for you is a good option, but it can be expensive and we all deal with budgeting. If you follow these guidelines and schedules for home remodelling tips and ideas, the following examples will help you prepare better for your project.
Step- 1 – Plan a budget
The most important aspect of the planning process, large or small, is the amount of work and ensuring that you have sufficient funds to finance the project. Budgeting is the first step.
The various costs associated with home remodelling can be as varied as you might think, so make a spreadsheet or a running list of your most desired products. Do a quick search to calculate the average cost of each of these projects, and add it all up to get a better estimate of the cost of the project. The most difficult aspect of budgeting is the estimation of labour costs. It is advisable to allocate 20-40% of the total budget to work.
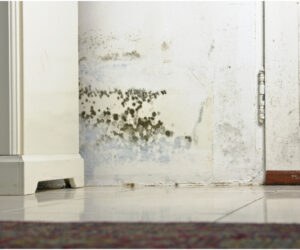
Most problems are detected during the demolition and drywall phase, but also common problems such as leaking pipes, mould, defective pipes, damage to the foundation and termite damage can be detected. Whether you budget for an eventuality of 10-20% depends on the size and type of your project. This may seem like a lot if you try to stretch every dollar, but remember that it is a safety net, and if you do not use it, you will be left with no additional money.
Once you have completed each stage of the process, you can spend the rest of your emergency fund. You can buy the free-standing tub or the expensive luminaire you have been keeping an eye on. Remodelling a home requires many factors, but there are some parts of the project that you should be willing and able to complete on your own to save money. Determine if you can do everything yourself.
The second step in remodelling planning is to make a list of all the work you want to do and decide whether you want to do it yourself or not. If you can do the job yourself, mark it as DIY. Mark it as a professional when you can’t be honest with yourself.
Now that you know what work you need to do as a professional, you can start looking for a contractor that suits you. The ideal contractor has previous experience in carrying out the work for which you use him. In order to do the job properly, you must have a license, be insured and have all the necessary permits.
If you want to do the demolition yourself, proceed carefully and follow all safety precautions. Once you have completed your plan and selected your contractor, it is time to start demolishing. This is the second stage of the demolition. Dumpsters are ideal to hold the project and go through it to remove debris from your home before it is demolished. This reduces the amount of chaos and allows you to finish the work as quickly as possible.
Step- 2 Demolition of existing structure
A demolition can be dangerous if carried out incorrectly. Once you have completed your demolition work, you can start roughening. This includes work on floors and walls such as sewerage, central heating and air conditioning, as well as a new electrical and sanitation system. Plumbing and electrical inspections must come to your home at this time to ensure that your systems are up to date. Heating, ventilation and air conditioning systems (HVAC) as well as electrical / sanitary systems will be treated in Phase 3.
Step- 3 – Plan on Electrical, HVAC,and Plumbing
Once the repairs to plumbing, electrics and HVAC are complete, the signal is that it is time to tackle the scaffolding and drywall. The rewiring of the sanitary facilities must be completed before the rough laying of floors, drywall and painting work, as it can damage everything.
Step- 4 Drywall framing
The drywall process consists of hanging up drywall panels, applying drywall material, drying and subsequent sanding until a perfect surface is created. Once the drywall is smooth, it is time to paint with a blank canvas.
Step-5- To do painting work
Painting is a work you can do alone, but it can be difficult. If you want a clean, perfect coating without stress, you can hire a specialist.The rest of the room takes shape as soon as the painted walls are standing.
Step -6 To fix fixture and cabinets
The following items are to be planned: wardrobes, lighting, bathtubs, showers, toilets and sinks.
Step- 7- To Check on Flooring
If you are installing laminate flooring, you should have the doors fitted. Check the doors to open and close them before laying the carpet. Windows and doors should be installed so that windows can be hung over the doors. Vacuum the entire building including the vents.
Remove the remaining dirt and dirt with a broom or cleaner. You can also reserve a dumpster for larger pieces of debris along the way. After the renovation dust has settled, you should hire a specialist to clean your ventilation slots and ovens.
Step- 8- Fixing of door frames
Floor coverings In general, it is best to install floor coverings at the end of the conversion process to avoid scratches, punctures and damage to the floor covering. In the next step of the renovation, carpeting, laminate tiles and the rest of the floor should be laid. Nails, claddings, surfaces, door frames and floor coverings can be laid later.
Now is the time to arrange furniture, lighting, appliances and other things to make your home a home. Use a shopping cart or a cloth to bring items outside to avoid damage to the house. Now you have accomplished the mission of getting everything inside. Sit back and enjoy your new surroundings


